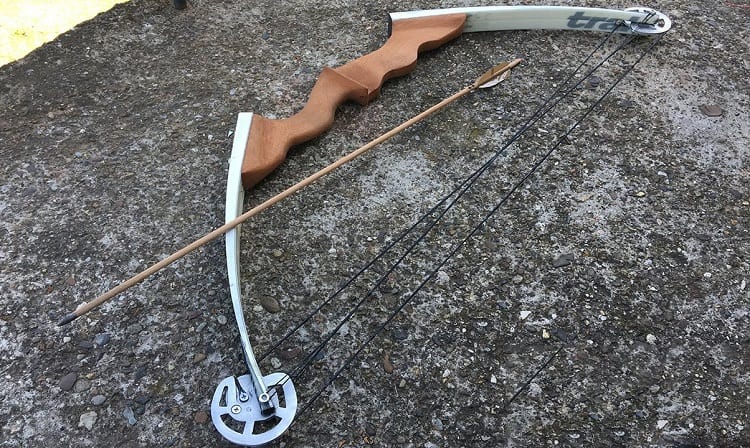
Recurve bows are popular for their versatility.
Learning how to build a recurve bow involves some level of commitment as it is both time and energy consuming.
Learning how to make a recurve bow can also be quite satisfying.
In this article we will show you how to make a recurve bow in the most basic way possible, however it is important to note that there are several more advanced and elaborate ways to make more complex recurves.
What do you need for a recurve bow?
There are some very basic tools and materials that you will need to make the textbook style recurve bow.
It also requires patience, a little time and your hard working skills to make this admirable bow.
The size described below is for a standard size recurve bow.
However, depending on your size and how big of a bow you are comfortable handing, you may want to alter the size of the bow.
To do this, simply change the amount of yew, wood board and wood laminate that you use.
Here is a list of the most useful tools and materials that you will need:
Tools Needed
- A saw
- A long, cylindrical file or a knife and a flat file
- Large file
- Hatchet/Axe
- Vice grip
- Some large Screw clamps
- Heat gun
- Draw knife
- Tillering stick
- Bow shaping frame
- A pencil
- A rasp
- Sandpaper
- Ruler or tape measure
Materials Needed
- Wood: maple, lemon wood, hickey or oak black locust or yew. Beware of bamboo, birch and other woods, as these won’t work
- Bowstring: Parachute cord or nylon bowstring (or another thick type of string). A wooden board- must be 2 by 4 feet. Wood laminate. A bow stave. Finish, i.e. wax or oil
Where to get those materials?

All of the materials listed above are readily available and can be found at your local home improvement or hardware store.
With the help of this article, you should be able to make a very agreeable bow at home, without the need to purchase a ton of materials.
The most important material you will need to take your time acquiring is the wood.
Depending on where in the world you live will determine what is ready available to you.
The easiest way to acquire the wood is to seek out a wood mill and shop their selection of locally sourced wood.
If you are a true craftsmen, you could always go into the forest, pick out a suitable tree and chop it down and widdel away at it. But, that is not always an option or legal.
All other supplies and tools should be readily accessible at your local hardware store or woodworking shop.
Step by step guide (in easy 6-7 steps)
From start to finish, it would usually take a month or two to finish a bow, depending on the amount of time it takes to prep the wood, to gather the tools and get the needed materials.
Also, carving its design and polishing can add extra time.
Get The Stave
The first step towards making a recurve bow is to get a stave (a long wood plank) and the best way to do this is to cut down a small tree, preferably oak or ash.
Look for a tree that has a diameter of 20 cm or less. Once you cut the tree, reduce the length to between 1.6 and 2 meters.
With this shorter length, split the piece into quarters.
Then, put glue on the end and back of the wood so as to avoid any kind of cracking in the long run. Let the wood dry for a month.
If you don’t want to work this hard for the stave, you can also buy one, premade. The stave is what your bow will be shaped from.
It needs to be at the length that you want your bow to be, and it should be made from wood that is strong, flexible, and malleable.
Gather your Tools; Chase the Ring
A hatchet, vice grip, bow shaping frame, tillering stick, large file, heat gun, a few screw clamps, and a draw knife will make the process far easier than just using a knife and a large, round object.
Chasing the ring refers to leveling the entire back of the stave so as to maintain a single growth ring, which will help to remove any bad wood outside the ring.
Here are a few things you will need for chasing the ring: drawing knife, regular knife, files, and sandpaper.
For this, first mark the ring of the wood piece and then start removing the outer ring. Now use sandpaper to remove the thin layer which will be left.
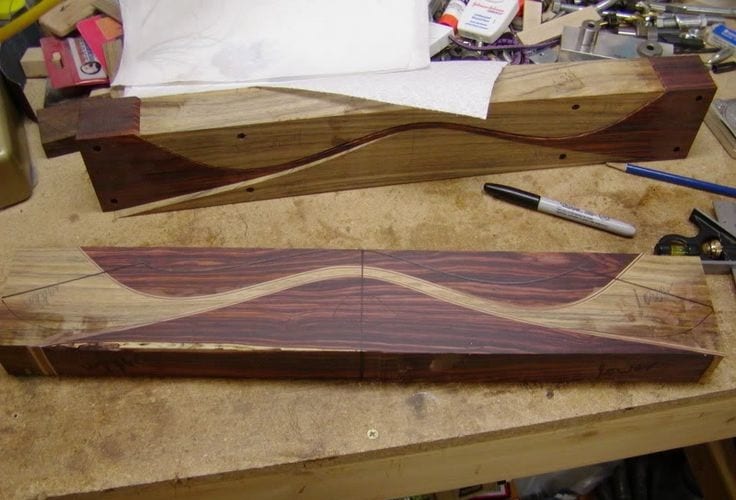
Laying Out The Design
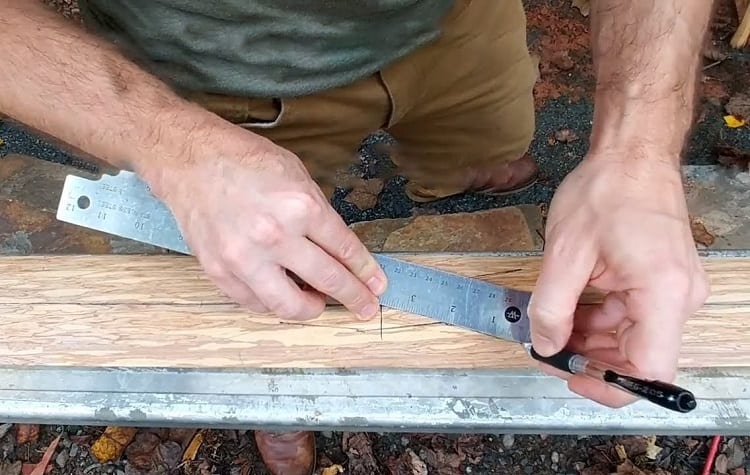
Your design layout depends on which part of the stave you want to use. So the best way would be to mark the stave with a marker or pencil.
Now measure ¼ inches from the markings on both ends and cut off for ease of maneuverability of the stave.
You will notice that your stave is now half an inch longer than the required size.
Now locate the midpoint between the two points and draw a line across the stave which will be the midpoint of the handle.
Now put strings at the tips where the nooks are supposed to be. After the strings are attached, draw a line with a pencil or marker along the strings.
Make an outline of the limbs and arrow rest of your bow with a pen.
Stand the stave up in one hand, and with the other, swing your hatchet.
Make the stave as smooth on the sides as you can.
You can decide the specifics (flat limbs, wide or narrow limbs) on your own. Mark out where you want your handle to be.
Form the limbs
After you have gotten your bow into an outline with the hatchet, you shape the limbs.
Place the handle section of your stave in the vice, and tighten it. Make sure the back is facing upwards.
Take the draw knife, and draw it along the stave in long strokes. Do this until your stave is the thickness that you want your bow to be.
Targeting the Weight and Thickness

You need to choose a target draw weight.
So, say you are targeting the draw weight at 50 pounds then you have to ensure that the bow is also 50 pounds.
For this, you have to draw a line through the sides of the stave for half an inch from the back.
Bending The Stave; Test your Stave
Place the tip of the bottom of your bow against the innermost part of your foot, with the bow’s back against your foot.
Now grab the handle with your hand and place your other hand against the back of the bow.
Now start bending the stave gradually and ensure that both ends are of the same degree.
Keep bending the stave until it gets to about 15 to 20 cm. Don’t bend too hard or sharp, as it could damage your stave.
Add Strings
You will need a knife, a parachute cord and a tillering stick to create a notch on both ends of the stave.
Gently use the tillering stick to cut the stave, where you had earlier marked for the string.
However, ensure that you do this only after you have bent the stave at the desired position.
Create a loop on the edges on a string that has to be twice the length of the bowstring you will be using.
Now attach the loops on the notches and then put the stave on the tillering stick and then pull the tillering string.
Is it easier to make compound or recurve bow
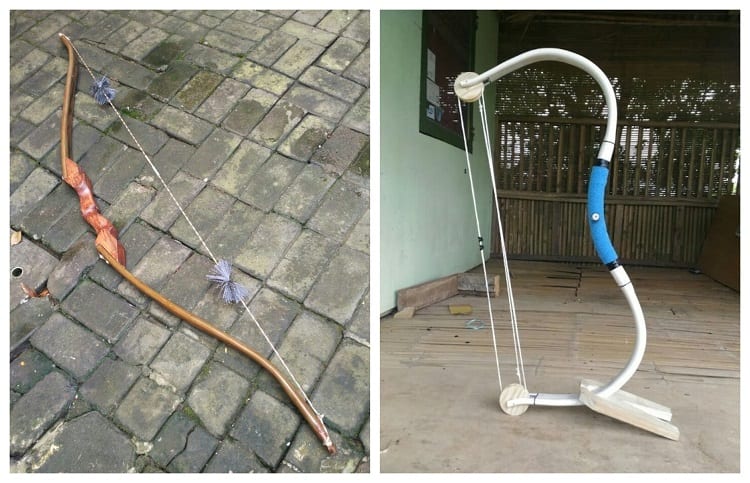
It’s hard to envision building a compound bow because of its mechanical complexity as well as the many materials needed.
However, building a recurve bow from scratch seems a more plausible feat.
Both of the different types of bows have their advantages and disadvantages when you wish to build your own.
Which is easier to make depends greatly on your skill and experience level.
Let’s look at some comparisons to help you better decide which type of bow you should attempt to make yourself.
First the Recurve Bow
Here are the basic advantages and disadvantages of a recurve bow.
Advantages of a recurve bow
Recurve bows are relatives of the earliest bow hunting, dating back thousands of years.
Mastering this traditional bow takes a great deal more practice, technique and right-down artfulness than mechanized,compound bows.
However, they tend to be lighter and easier to carry. That can be a serious advantage on a hunt. Other benefits include:
That can be a serious advantage on a hunt. Other benefits include:
Other benefits include:
- Lighter and easier to carry
- Less mechanisms to upkeep
- Traditional sportsmanship
Disadvantages of a recurve bow
Like all traditional bows, recurve bows do not have the mechanisms (wheels and pulleys) that compound bows or crossbowshave.
They rely entirely on your strength. Despite the lighter weight, they require more force to draw.
So, having great upper body strength is more important on a recurve bow and a compound bow.
The recurve bow will also require you to be closer to your target, which involves technique and talent that are honed by experience.
Mastery over years also has the drawback of taking a lot of years and time to pick up.
Other disadvantages include:
- Requires more upper body strength to draw and hold
- Must be closer to your target
- Requires more practice
Now the Compound Bow
For those that don’t already know, a compound bow is a bow that uses a set of cables, pulleys, and eccentric wheels to create leverage and manipulate the force that it pulls with at different draw lengths.
Normally you want this type of bow to pull with a lot of force during most of the draw, then “let off” to a lower weight once drawn all the way back.
This way it is easier to shoot but still gives better performance than a more traditional type of bow.
Here are the basic advantages and disadvantages of a compound bow.
Advantages of a compound bow
You still have to practice and sight your bow with a compound bow, but not as much as the recurve bow.
Because they do not rely on physical strength as much, compound bows allow more accuracy and power from a greater distance.
That means related skills, like stealth and concealment, are less critical.
A compound bow also allows more customization than a traditional bow.
Compound bows are made to accommodate a lot tools, like scopes and stabilizers.
Additional advantages of a compound bow include:
- More accuracy and power
- Greater distance from target
- More customization and add-ons
- Requires less upper body strength
Disadvantages of a compound bow
The disadvantage of a compound bow is that it has a more modern feel, for those looking for that back-to-the-roots experience.
It also means that stringing, tuning, and maintaining your bow requires more gadgetry and skill.
The more complex the machine, the more mechanical savvy you need.
Unlike a traditional bow, the compound bow’s draw is set, so you have to be sure to size your bow correctly when buying.
Compound bows are also considerably heavier and bigger than a recurve bow.
Other disadvantages of the compound bow include:
- Heavier than a traditional bow
- More maintenance
- Draw length is more important
Recurve bows are lighter and easier to maneuver than compound bows, which often makes them great beginner hunting bows.
They’re also easier to build and maintain in most part, due to less mechanical parts.
The material used to construct compound bows are more expensive and have a wider range. The general materials include aluminum, carbon, wood etc.
A compound bow is however, smaller in size but does consist of more parts like cams, stops and multiple strings, and the extra thickness of the riser makes it heavier than a recurve bow.
So, regarding build, recurve bows are an excellent option, more straightforward and lighter than a compound bow with less moving parts therefore we conclude it is easier to make a basic recurve bow than it is to build a compound bow.
Other Factors to Consider With This Bow Building Complete Guide
To make a recurve bow, you need to consider the draw weight of the bow.
A traditional recurve bow is a good idea if you want to make your own bow.
The end of the bow is an important part to give close attention during the building process.
There are various options available in the market today for recurve bows. It is important to shape the bow properly to ensure its effectiveness. Bow building requires certain techniques and skills to achieve the best results.
Higher draw weights can provide more power and accuracy in shooting. When making your first bow, pay attention to the bottom limb as it plays a crucial role in the bow’s performance as does the bottom tip.
he choice of materials is also important, and wooden recurve bows are often preferred by archers. When drawing the bow, use your middle finger as a best ways guide. Target archery is a popular sport that requires a well-made bow. Osage orange is a type of wood commonly used for making recurve bows.
The bottom limb of the bow should be designed to handle higher draw weights. It is important to smooth out any rough edges on the bow to avoid discomfort during shooting. Finger tabs can provide added protection and comfort while shooting. Archery ranges are great places to practice and improve your skills.
The length of the bow can affect its performance, so choose the appropriate size for your needs. A drill press can be a useful power tool for certain aspects of bow building, just make sure its sitting on a flat surface. Archery shops offer a wide range of equipment and materials for bow making. The shape of the bow can impact its performance and accuracy. It is important to follow proper techniques and guidelines when building a recurve bow.
To make your own recurve bow, start by selecting the best wood for the bow limbs. Wooden staves made from hickory, yew, or osage orange are excellent choices. The length of the bow should be determined by your full personal draw length, which is the distance from your fingertips when your arm is fully extended. A good rule of thumb is to choose a bow length that is twice your full draw length.
Once you have selected the right bow length, shape the bow limbs to the desired shape using a draw knife or rasp. It is important to maintain good balance between the top limb and the bottom limb to ensure proper performance.
Next, you will need to make wooden arrows to go with your wooden recurve bow. The best way to do this is by selecting straight-grained wood such as cedar or spruce. Cut the wood to the desired length and shape the ends to fit arrowheads. You can find arrowheads at hardware stores or online. Attach the arrowheads securely using glue or by wrapping the ends with thread.
Professional archers recommend wearing a face mask to protect your face from the bowstring. This is especially important when shooting with a wooden recurve bow, as the bowstring can cause painful welts or cuts if it hits your face. Face masks can be purchased online or at archery supply stores.
Making your own recurve bow can be a rewarding and fulfilling experience. By selecting the best wood, shaping the bow limbs correctly, and practicing proper technique, you can create a bow that is both functional and beautiful. Remember to always prioritize safety and wear protective gear when shooting.
To make a recurve bow, start by using a belt sander to shape the wooden stave into the desired bow form. Next, attach a bow string to the bow and adjust it to the proper tension. The final step is to tiller the bow, which involves carefully removing material from the limbs to achieve the desired draw weight and balance. You can find all the necessary materials and tools at your local store or home depot.
Using a release aid can help you achieve greater force and accuracy when shooting. Remember to always practice proper safety precautions when working with tools and equipment.
When choosing the wood for your wooden recurve bow, it’s important to select a strong and flexible wood that can handle the potential energy stored in the bow. Some good choices include yew, hickory, and osage orange. Consider the size of the bow as well, as it should be proportionate to your body size and strength. If you’re unsure, it’s best to consult a professional or experienced archer for guidance.
To ensure the best quality and performance of your recurve bow, it’s essential to have the necessary skills and knowledge in bow making. Traditional recurves require a certain level of craftsmanship and attention to detail. If you’re new to bow making, it’s recommended to start with a beginner-friendly kit or seek guidance from an experienced bowyer.
Making your own recurve bow can be a great way to connect with the ancient art of archery and develop your skills as an archer. It allows you to customize the bow to your preferences and learn about the physics and mechanics behind its design. With practice and dedication, you can become proficient in shooting with your handmade recurve bow.
Understand making a recurve bow involves shaping the wooden stave, attaching a bow string, and tillering the bow to achieve the desired draw weight and balance. It’s important to choose the right materials and tools, as well as have the necessary skills and knowledge in bow making. By following the proper steps and practicing proper safety precautions, you can create a high-quality recurve bow that suits your needs and preferences.
Developing professional skills is crucial when making a recurve bow. Attend archery classes or workshops to learn proper shooting techniques and form. Practice regularly to improve your accuracy and consistency. By honing your skills, you can enhance your overall archery experience and maximize the potential of your recurve bow.
Choosing the right bow size is important when making a recurve bow. Consider factors such as your height, arm span, and draw length to determine the appropriate size for you. Consult with experts or refer to popular choice for guidance on selecting the correct bow size. By choosing the right size, the right recurve bow shape you can ensure comfort and optimal shooting performance.
To make a recurve bow, it is crucial to select from the best recurve bows available in the market. Research different brands and models, from a thin piece of wood to its final thickness, considering factors such as quality, durability, and first time customer reviews. By choosing a reputable and well-regarded bow, you can have confidence in its performance and longevity.
In summary, we can say that for the beginner bow maker who wants to build their first homemade bow– the recurve bow is the best choice.