
One of the most elementary ways to improve your success as a bow hunter is to practice.
We’ve all heard the old saying, “practice makes perfect”, and whether we like it or not, there is some truth to that saying.
It’s probably impossible to be perfect, but practicing can increase your chances of success on your next hunting trip.
Practicing your archery skills requires that you either practice at home or find a local archery range to practice at.
Both options are good, but if you want to practice frequently over the long time, ranges can be expensive.
Being able to shoot at home, or in the field can be a good way to both save money and practice anytime you want.
To practice at home, you’ll need a good target.
You can buy commercially produced targets, however, commercially produced targets can be expensive and some are not as durable as you might want them to be.
A good solution to the problem of spending too much on target practice is to make your own targets.
This is a surprisingly easy task, and can also be relatively inexpensive.
Making your own targets for the very first time allows you to construct the very best archery targets for your specific needs, without relying on expensive materials.
Many of the materials that you need to make your own targets can be found for little to no cost to you.
A couple of things to keep in mind before you run out and start mass-producing your homemade targets.
- Don’t skimp on the filler. Your target needs to be densely packed in order to stop your arrow. This is particularly important if you are using a crossbow or a compound bow with a higher poundage pull weight.
- When your targets start getting worn in the middle, either repack or replace. When the center of your target gets weak, it is more likely to let an arrow pass through. This can be dangerous and could cause harm to structures, people and pets that might be in the vicinity.
- Place your target in a safe location. This means away from buildings, walk-ways, dog houses, windows, roads, etc…Make sure that you place your target in a location where you can miss, and you won’t have to worry about hitting something you don’t want to hit.
When you’ve found a good spot for your targets, it’s time to start building.
We’ve got a few options for you when it comes to creating your own archery target.
Straw Bales vs Hay Target
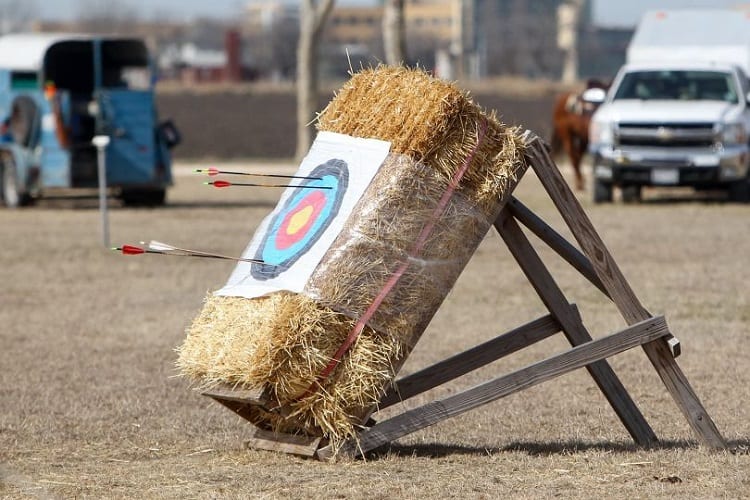
These are probably the easiest of the homemade targets, and honestly they have been used for years and years, and still work great.
To make straw bale targets you will need two items: straw bales and paper targets.
You will want to purchase multiple straw bales for this type of target.
There are a couple of reasons for this.
First step, you want to make sure that you have two bales behind your target, especially if you’re shooting a higher-powered bow, to have plenty of stopping material.
Second, you may want to stack your bales to make them a more comfortable height for you.
Third, having a few extras will allow you to swap bales when they get worn.
We would recommend at least four bales to start.
Make sure that you purchase straw over bales of hay.
Hay bales can be quite expensive, and if you are looking to save some money, straw is a more frugal option.
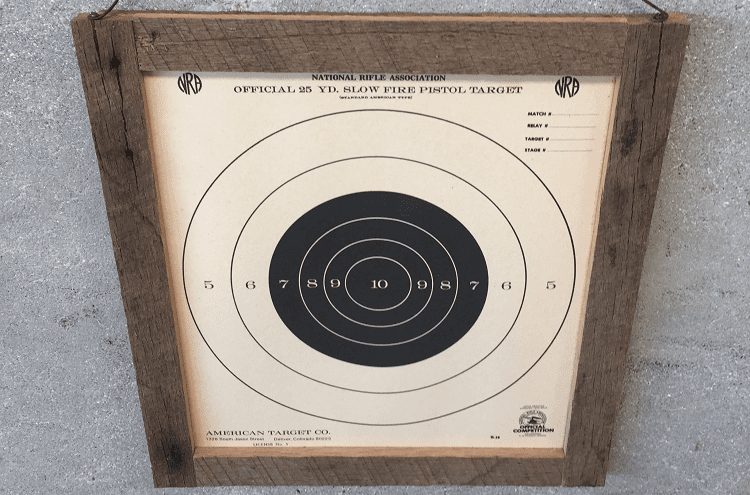
Paper targets are readily available at your local sporting goods or hunting store.
Buy these in bulk packs so you can switch them out often.
You don’t need anything special to attach your paper target to your bales.
Simply slide the target under the baling wire or twine.
If this doesn’t work, you can use long nails to pin the corners of the target to the bale and now you have a new archery target to practice with.
Homemade Archery Target-Cardboard Archery Target
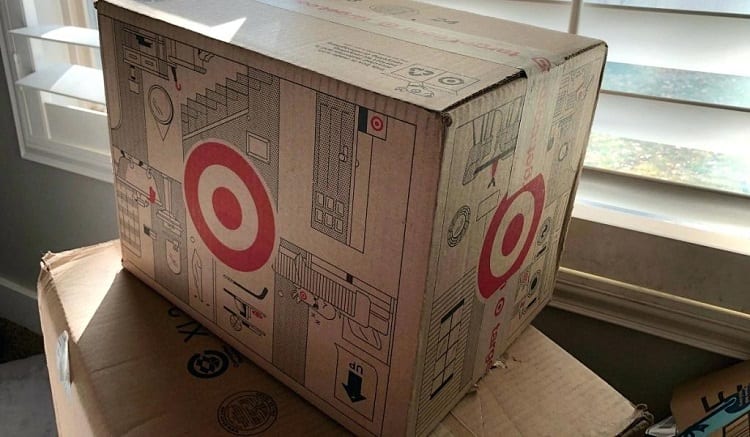
This is another simple, yet effective way to create a portable and inexpensive yet own archery target.
To make a cardboard box target face you will need three items: a large cardboard box, filling materials, and duct tape.
A good idea if you may is to have paper targets or paint, and 2X4s.
To start, find a large pieces of cardboard.
We recommend that the box you use be at least 18 inches square.
Commercially constructed cube targets are generally 12 inches square.
Making a big target size will ensure that there is plenty of stopping material, this makes for a good backstop.
Check with local appliance stores, grocery stores, hardware store or moving companies for large boxes, or scrap materials.
You can buy packing boxes, but local businesses may be willing to give you boxes for free.
Your optional 2X4s can be attached to the sides of the box, to provide extra support for the target.
To fill your cardboard target, you can use a variety of materials.
Shrink wrap, or scrap foam is an easy and readily available material that makes a great filler for your foam targets.
A great idea is to seek any business that receives a product on a pallet is likely to have tons of shrink wrap or discarded packing material and will give it away for free.
If you don’t have a source for used shrink wrap, you can fill your box with plastic grocery bags, packing foam, foam mats, old clothing, rags, straw, burlap sack or any other dense material.
You’ll want to pack your box really full, to provide plenty of stopping force for your arrows.
When your box is as full as you can possibly get it, use the duct tape to close up the box.
Make sure that you don’t skimp on the tape.
The last thing you want is for your filler to fly out of your box, while you’re practicing.
When your box is sealed, it’s ready to use.
However, you may want to attach a paper target to the box or use paint to create your own target on the side of the box.
Wooden Frame Target
The wood frame target is the most complex of the targets that you can make at home.
However, it is the most durable of the three options and is the longest lasting as well.
To make a wood frame target, you’ll need the following supplies:
- 2X12 boards cut no longer than 3 feet long.
- 3 1/2” screws
- Chicken wire
- Staple gun
- Circular saw
- Drill
- Filler material
- Canvas fabric or foam
- Paper target (optional)
- Paint (optional)
To make your own DIY archery target
- Use the circular saw to cut your boards. You may want to cut the two sideboards longer than the top and bottom board, so your target has legs. If you want this target to be portable, we would recommend that you keep the target to no more than 3 feet square.
- With your saw, cut a hole into the center of the board that will be the top of your frame. Make sure that the hole is large enough for you to easily reach your arm through. You will use this hole to fill and empty your target.
- Screw together your boards. Don’t use nails. Archery practice will put a lot of stress on your target. Screws will hold the joints together better than nails.
- Cut two sections of chicken wire. Make sure that you cut the chicken wire a bit larger on each side than the frame. You’ll want to wrap the chicken wire over the sides of the frame for more strength.
- Staple the chicken wire to the frame. Use plenty of staples for added strength. Do this over both open sides of the frame. The chicken wire will hold your filler in place.
- Fill the target. Like with the cardboard box target we discussed above, you can use a variety of different materials to fill your target. To keep your cost down, use recycled materials like plastic bags, used shrink wrap, old clothes or rags, or used packing materials. Don’t skimp on the filler. You’ll want the target to be packed as full as possible to provide adequate stopping for your arrows.
- You may want to add a cover to the hole you filled the target through. Use a small piece of chicken wire to do this.
- Using canvas or thin foam, cover the front of the target, over the chicken wire. This will keep your filling from coming out and will provide something more solid for your arrow to pass through.
- If you desire, attach a paper target to the front or paint your own target on the foam or canvas.
With your wood frame target, you will need to periodically replace the filler material.
You will also need to replace the foam or canvas cover when it gets beaten up.
While this type of homemade target will take you more time to construct, once you have the frame built, you have a durable target that won’t cost you a ton of money to refill or repair.
If you are ready for a wallet-friendly alternative to archery ranges and commercially produced store-bought targets, a homemade target is just what you need.
Not only are they easy but also they don’t cost a lot of money, and they are also a great way to recycle different materials that would usually end up in our landfills.
These three, easy to make targets will have you practicing at home in no time, continuously providing you with a new target and getting you seasoned for a successful hunting season.
Also keep in mind there are other alternatives that traditional archers utilize such as, foam floor mats, carpet archery target, hay archery target, puzzle mats all great for outdoor use and something we will talk about later.